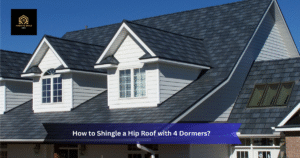
A hip roof with dormers is a common sight across American homes—from suburban neighborhoods to countryside properties. These roof styles add character and space, but they also make shingling more complex. Each dormer creates valleys, ridges, and flashing points that require careful installation to prevent leaks.
Why This Matters for U.S. Homeowners
Roofing costs, materials, and climate vary greatly across America. For example:
- In Northern states, ice and snow make ice-and-water shields critical.
- In Southern states, heat and hurricanes require impact-resistant shingles.
- In Coastal regions, salt and wind demand extra flashing protection.
In this article i describes U.S. roofing standards and highlights the considerations American homeowners need to know.
Tools and Materials Commonly Used in the U.S.
Most roofers in the U.S. prefer asphalt shingles because they are affordable, durable, and widely available. For a hip roof with four dormers, you’ll need:
- Architectural asphalt shingles (most popular choice in the U.S.)
- Roofing felt or synthetic underlayment
- Ice and water shield (required in colder U.S. states)
- Metal drip edge (now required by most U.S. building codes)
- Step flashing and valley flashing
- Roofing nails and nail gun (coil roofing nailers are standard in the U.S.)
- Ridge and hip cap shingles
- Safety gear: harness, roof jacks, and OSHA-approved ladders
By using code-approved materials, you ensure compliance with local U.S. building regulations.
Step 1: Prepare the Roof Deck
In the U.S., building codes require a solid deck before shingling. Check the plywood or OSB sheathing for rot and replace any damaged sections.
- Install drip edge along eaves and rakes. (Most U.S. states now require this under IRC [International Residential Code]).
- Remove old shingles and underlayment completely.
- Inspect decking for nails or uneven areas.
Step 2: Install Underlayment and Ice Protection
Different regions in the U.S. have different code requirements, but generally:
- Ice and water shield is required in northern states along eaves and valleys.
- Roll out synthetic underlayment across the main roof areas.
- Overlap by 4 inches to meet code.
This step is critical because U.S. insurance companies often deny claims if roofs weren’t installed with code-compliant underlayment.
Step 3: Start With Starter Strips
Install starter strips along eaves and rakes of both the main roof and dormers. In the U.S., many shingle manufacturers like GAF and Owens Corning recommend using their branded starter shingles for warranty compliance.
Step 4: Shingle the Main Hip Roof
Follow the American standard nailing pattern:
- Four nails per shingle minimum (six in high-wind regions like Florida and Texas).
- Use chalk lines to maintain straight courses.
- Overlap per manufacturer’s instructions (usually 5–6 inches).
Step 5: Address Dormer Valleys
Valleys are critical leak points on U.S. homes. To install them properly:
- Lay metal valley flashing (26-gauge or thicker, per code).
- Apply ice and water shield under valleys for extra protection.
- Use a closed-cut valley method—common across the U.S.—for a clean, watertight finish.
Repeat for all four dormers.
Step 6: Flash Dormer Walls
The intersection of dormer walls and the roof is one of the most leak-prone areas in American homes. Use step flashing with each shingle course.
- Overlap flashing pieces by at least 2 inches.
- Secure under shingles but against the dormer wall.
- Cover with siding or counter-flashing.
This method meets U.S. code and is recommended by the National Roofing Contractors Association (NRCA).
Step 7: Shingle Around Dormers
- Continue shingles around dormer bases, trimming neatly.
- Align courses with the main roof for a professional look.
- Nail carefully without puncturing flashing.
In U.S. installations, clean dormer detailing adds curb appeal, which is especially important in competitive housing markets.
Step 8: Cap the Hips and Ridge
Hip and ridge caps finish the roof:
- Install hip caps along all hips.
- Use ridge cap shingles along the peak.
- Nail per manufacturer’s specifications for warranty compliance.
Most U.S. roofing warranties require matching manufacturer ridge caps to keep coverage valid.
Step 9: Inspect the Finished Roof
After installation, inspect:
- Valleys and flashing for tight seals.
- Straight shingle courses (important for curb appeal).
- Exposed nails—cover with roofing cement.
Many U.S. homeowners schedule a final inspection with local building departments, especially if permits were required.
Cost Considerations for U.S. Homeowners
According to recent U.S. data:
- On average, asphalt shingle roofs cost between $5.50 and $9.50 per square foot.
- Adding four dormers increases labor time by 20–30%.
- Depending on the area and materials, a standard 2,000 square foot hip roof with four dormers could cost anywhere from $15,000 to $22,000.
Understanding these costs helps American homeowners budget realistically.
Final Thoughts
Shingling a hip roof with four dormers isn’t a beginner’s job, but with the right materials, planning, and adherence to U.S. building codes, it can be done successfully. The key lies in proper flashing, valley installation, and code compliance.
Hiring a qualified roofer is frequently the wisest course of action for homeowners in the United States, particularly in regions with severe weather or stringent code enforcement. But whether you do it yourself or hire a professional, following these steps ensures your roof remains watertight, durable, and visually appealing.